
Finally, got my github pages done.
It was confused for me about how to apply Jekyll Themes. At begining, I followed tutorial to download & install Ruby/Jekyll and other stuff and then I realized that I don’t need to start from scratch. After all, I just want to have a blog on github. Here are simple steps:
Step 1: Find a theme
Themes can be found in many places like jekyllthemes.org, jekyllthemes.io and others. Or just simply search in Google.
Consider following things when you choose a theme:
- Do you like it?
- Does it support mobile view?
- Do you need side column for categories, posts list, etc?
- Do you need features like search, analytics, etc?
- Do you need to support comments?
Step 2: Apply the theme
Most of themes are on github.com. So just simply go to its repo (I use Reverie).
First option: create from the template
For example,
-
Press the
"Use this template"button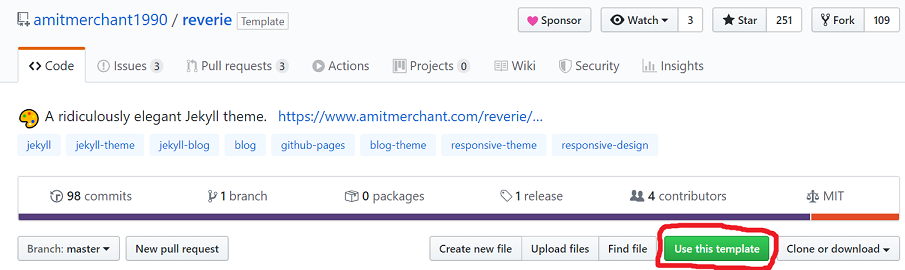
-
Fill new repo’s information and press
"Create repository from template"button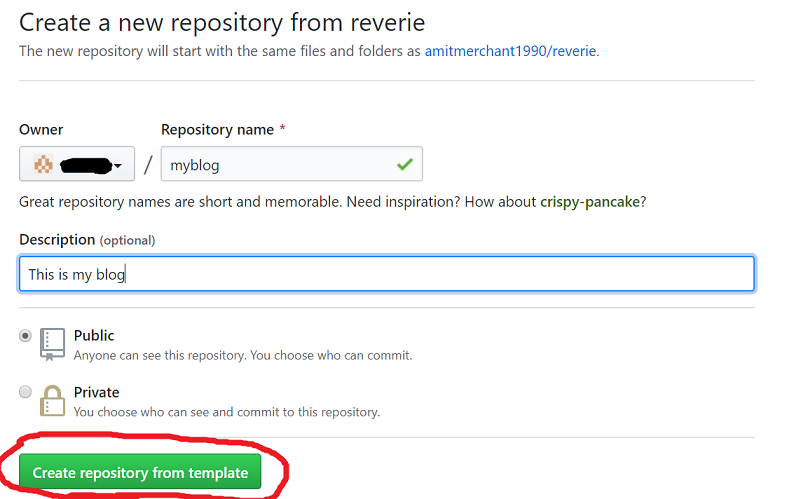
Second option: download files and update your repo directly
If you have already created your repo, you can download template and put all files into your repo directly. (This is what I did)
Step 3: Customize
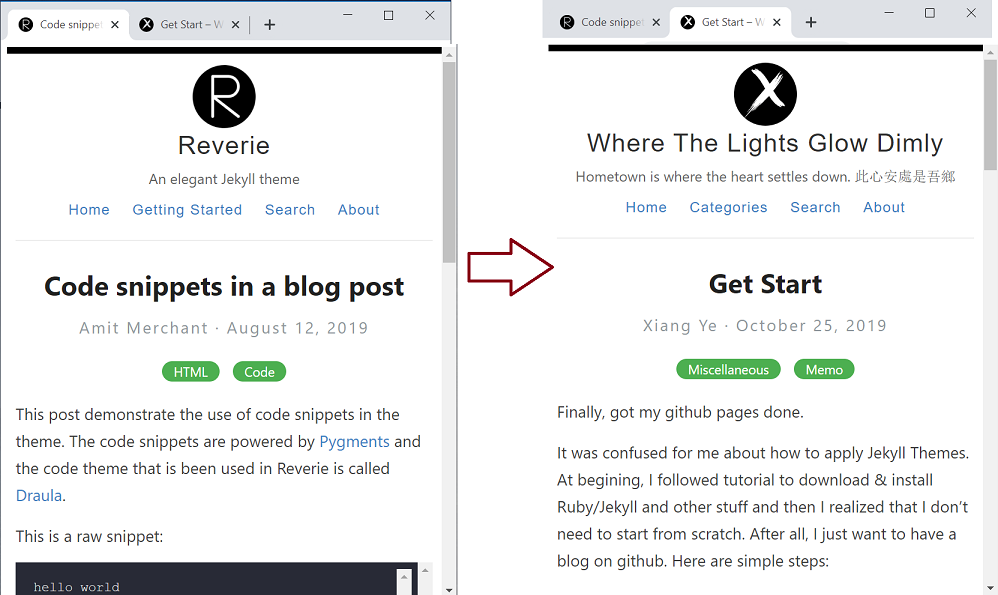
After step #2 you should be able to see your pages (same as the template). Next is to customize pages to make it your own.
- Go over the pages quickly and find out all the text, pictures and links belong to the template. (For example,
title,description,names,icon, etc). - Update text, use your own.
- Update links to you home page, twitter, github, linkedin, etc.
- Create/Choose your own picture used by your pages.
- Modify template source code when it is necessary (I have to say that no template can meet expectation perfectly – a little bit change can make it much better).
Don’t spend too much time on this, theme is never the purpose
Step 4: Post
That’s the most important part! Write first post and post it!
Tricks
- Edit your post under
_draftsfolder, when it is done, move it to_postsfolder and prefix its file name with"YYYY-MM-DD-". - Create a folder for each post under
images(orimg) using the post’s name, and put all images used by this post into that folder.